Saturday, November 26, 2011

Project #26

Christmas Card

For the 26th Project I wanted to do something for Christmas.  We never had a birth announcement done for Ruby when she was born and that was one thing I wanted to do.  But life happens and before you know it she's 7 months old.  After shedding a few tears about that I decided that I would use her for our Christmas card this year to make up for not having a birth announcement.  I took the photos myself in our living room.  This allowed Ruby to be uninhibited.  She could be herself completely.

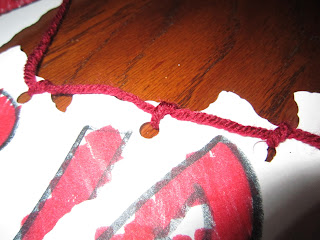
First I took some printer paper and magic markers to make a banner for the picture.
I wrote Merry Christmas on the paper and cut the individual letters out using scrap book scissers.

I wanted the letters to look cartoon-ish.

I punched holes and tied yarn to make the banner.


I moved the furniture around to get a bare spot on the wall and hung the banner.

Here are a few out takes from our shoot.


:)Megan

Friday, November 25, 2011

Project #25

Emmett's Balloons

When my cousin and his wife called me and asked me to take pictures at a balloon release to honor their son, I couldn't say no.  Emmett was still born on July 1, 2011.  To honor her son, Amanda, decided to raise money for the Pregnancy Care Center and to get the family together to release balloons.  It was a beautiful day and I wanted  the pictures I took to relfect the celebration of Emmett.  I tried to capture the mood of the day through my camera lens.  I think I have done that. 

The Pregnancy Care Center is a center "providing health, wellness, and relationship education for young people facing an unplanned pregnancy, and presenting healthy relationship education in local schools to equip teens to make positive choices."  Please visit the PCC website (http://www.pccchoices.org/) to see how you can help.


Baby Emmett will be forever missed and never forgotten.


:) Megan

P.S.
I am happy to announce that Amanda and Cody are expecting another baby! 

Project #24

Bag dispenser

I recently found a woman who made a plastic bag dispenser out of a Lysol wipe container.  I have a thousand plastic bags from the grocery store that just take up space in my laundry room.  I didn't have an empty Lysol container so I used what I had, an empty soda bottle from Thanksgiving.   With some craft glue and scrap fabric, my laundry room looks a little cleaner and I have more space to fold it. 


Cut the bottom off of the bottle.

I took 3 strips of fabric and braided it to make a strap for hanging the dispenser. 
I cut holes and tied it on.

I cut a piece of fabric to cover the bottle and the holes.  It just looks prettier.

Flatten the bag pushing all of the air out of it.

Fold in half and flatten again.
Line them up over lapping the handles of the bag on the bottom of the next bag.

Fold the handles of the first bag up and roll them tight.  For a 2 liter bottle I could fit 20 bags.

Drop in the bottle. 

Hang where you want!


I love this and my husband loves that the bags are no longer taking up as much space.
I am working on getting an empty Lysol container as well.  It would be great to drop in the diaper bag or car for whatever you may need them for.  (You never know what situation you will find yourself in with a baby.)


:)Megan

Thursday, November 24, 2011

Projects #22 & 23

My sisters Talent

When I first started blogging I mentioned that my twin sister would be contributing to the blog as well.  While going through the past posts, I realized that I hadn't posted anything of hers since I started.  So, this one is dedicated to showcasing her talent.

For Halloween she made her costume as well as our little sisters costume.  They were gypsys.  She made every piece of clothing.  Even the shirts! She also made the jewelry.


Look at the detail of the vest!


Chelsey is always thinking of new designs for dresses and clothing.  She is inspired by colors of the seasons.

This is a fall dress she made, including the belt.  The blue pattern is beautiful with the colors of fall.  She picked a good fabric for the this style of dress.  But, I don't expect anything less of course.

I aspire to have this kind of talent one day.  She made this without a pattern!  Jealous!

:)Megan


Project #21

Thanksgiving

This year I hosted Thanksgiving dinner.  It isn't my first time doing this, but it is the first time I cooked the turkey.  This is a big job.  If the turkey sucks, the dinner sucks and thats all anyone will remember.  Oh, sure they will tell you it was delicious, but they are just trying to spare your feelings.  I took some tips from my mom and I dove in. 

20lb Turkey.

I took one whole lemon, apple and onion and quartered them.

I stuffed them in the cavity to help create moisture from the inside.  (The worst part was reaching in to get the neck out.)

I cooked it at 350* for 4 hours.  It came out golden brown and delicious!
Truly a thanksgiving turkey to be proud of.


:) Megan

Tuesday, November 22, 2011

Projects #19 & 20

Etsy

I am currently working on stuff to put on my Esty site.  It is empty and I don't like that.  I like to share my crafts with others and I want it to be free.  However, a few extra dollars for more craft stuff would be nice. 

I made these out of scrap material I had . 


A folded Cap sleeve
This one is super cute......
and its reversable!


The Blue polka dot dres is a 12 month and the Pink and green is a 6 month.

:) Megan

Monday, November 21, 2011

Project #18

Wall Decor

When we remdeled our living room, I ended up with a wall that looked very bare.  I have been contimplating what to put in this space for awhile and then my brother and his family moved back from Italy.  While in Italy, they started collcted mascarade masks inspired by Carnavale.  In three years living there they acquired a mask for all the family back home.  This was my inspriration for my wall. 

Custom masks for me, Wes and Ruby


I thought about displaying them with a shadow box, but I didn't want to make one or buy one. I had these wicker hearts I had been using as a centerpiece on the coffee table.  They are perfect.

They looked lonely on the wall and we just hand our family pictures taken....

not so lonely anymore.


:) Megan

Project #17

Homemade bread

This project was an accident.  We were out of bread (my husband waits until its gone to tell me we need more) and I wanted a sandwich.  It was cold and rainy out and I didn't want to drag Ruby to the store in not so good weather.  So, I made some.  I found an easy recipe that I had all the ingredients for and got started.

After mixing the ingredients, knead like crazy!

Put in a bread pan and bake.

Beautiful golden brown color.


Ingredients:

  • 3/4 cup warm water
  • 1 package active dry yeast
  • 1 tsp salt
  • 1-1/2 tbsp sugar
  • 1 tbsp vegetable shortening
  • 1/2 cup milk
  • 3 cups all-purpose flour, approximately

Preparation:

  1. In large bowl, add the warm water. Slowly stir in dry yeast. Continue to stir until yeast is dissolved.
  2. Add salt, sugar, shortening, and milk to bowl. Stir.
  3. Mix in the first 2 cups of flour.
  4. If needed, begin adding more flour, one tablespoon at a time, until the dough chases the spoon around the bowl.
  5. You do not need to use up all the flour called for in this recipe, or you may need more flour than called for. The amounts vary depending on many factors, including weather, which is why most bread recipes only give an approximate amount of flour needed.
  6. Turn dough out onto floured board and knead, adding small spoonfuls of flour as needed, until the dough is soft and smooth, not sticky to the touch.
  7. Put dough in buttered bowl, turn dough over so that the top of dough is greased. Cover and let rise in warm spot for 1 hour.
  8. Punch down dough. Turn out onto floured board and knead.
  9. Preheat oven at 375 degrees F.
  10. Form dough into loaf and set in buttered bread pan. Cover and let rise for about 30 minutes.
  11. Score dough by cutting three slashes across the top with a sharp knife. Put in oven and bake for about 45 minutes or until golden brown.
  12. Turn out bread and let cool on a rack or clean dishtowel.
:) Megan

Sunday, November 20, 2011

Projects #14, 15 and 16

Birthday Dinner

This year I celebrate my golden birthday!  To make it special, my husband has planned something for everyday of this month leading up to my actual birthday.  He decided to have our friends get togther for dinner to celebrate a few weeks early because my birthday is so close to Thanksgiving.  Knowing that I can't JUST have a dinner with friends without something fun he decided to NOT make it a surprise.  Tho, that would have been fun.  We brainstormed and came up with a few ideas.  I am not a cake person, so I made a more "adult" treat instead.


Truffles. 

I also wanted a new dress, because every girl wants a new dress for special occations.  I wanted a dress that was classic, classy and modest.  I have been searching for a long time for a classic wiggle dress that fits, but my search has turned up nothing.  So, I made one that was close.


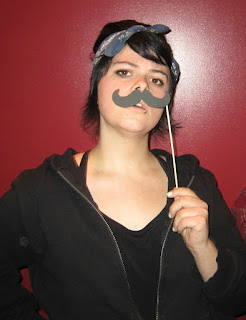
I love to document life with photos, so I wanted something fun we could all do that would allow us to take photos but also to relax and take a more natural photo.  So, photo props was the logical answer.  With some craft foam, skewers and glue, I made some inspired by my friends.


It all came together quite nice and I had a wonderful time.  Thank you to my friends for making it special and to my husband for spoiling me and letting my creative side shine.


:) Megan